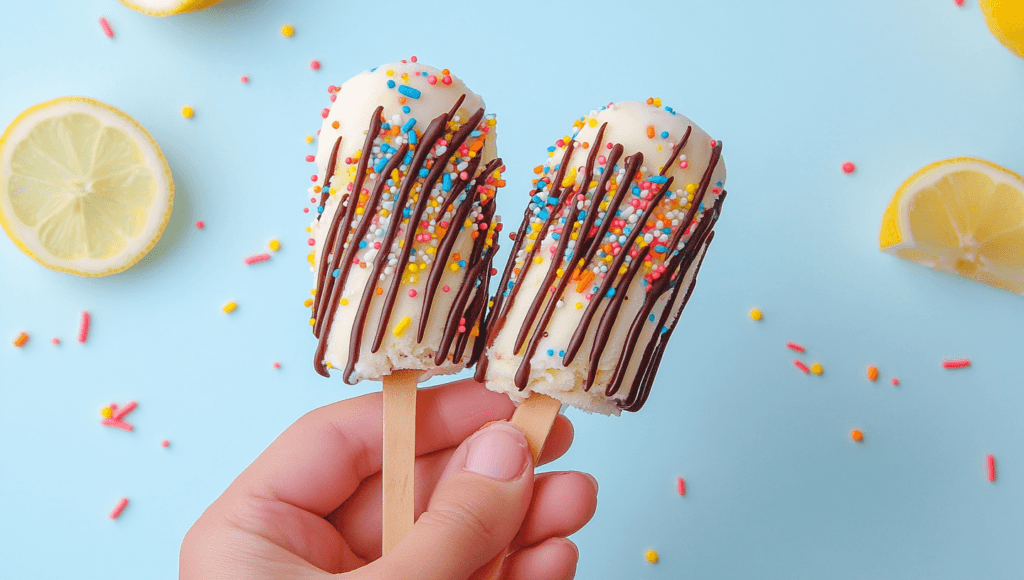
Who doesn’t crave a creamy, chocolatey pick-me-up in the summer heat? In fact, please meet your Homemade Eskimo Pie Popsicle Recipe: a easy, delectable frozen dessert featuring crunchy, dipped chocolate on top and smooth, luscious vanilla ice cream on the inside. Not only are these popsicles delicious, they’re also really easy to make at home. That will save you a trip to the store and put you in complete control of the ingredients.
Did you know that the original Eskimo Pie was invented in 1921 and was one of the first kinds of ice cream bars ever with chocolate coating? This homemade version is a tribute to that kind of thing, but with a fun little twist: It’s on a stick! So it’s ideal for kids and adults alike, so it’s a winner at parties, picnics or a sweet end-of-dinner treat.

If you loved our Homemade Chocolate-Dipped Banana Popsicles, you are going to love this recipe too! Not to mention, it’s just as easy but with a creamy, indulgent spin that’ll definitely satisfy your sweet tooth. So get ready to make your very own Eskimo Pie Popsicles. Let’s dive in!
What is Homemade Eskimo Pie Popsicle Recipe?
Ever wonder why it’s an Eskimo Pie Popsicle? Well, it’s a rather cheeky play on the classic Eskimo Pie — a chocolate-covered ice cream stick. But, rather than handheld, we’ve inserted a stick so it’s more enjoyable and easy to eat with. After all, who doesn’t love a food on a stick?
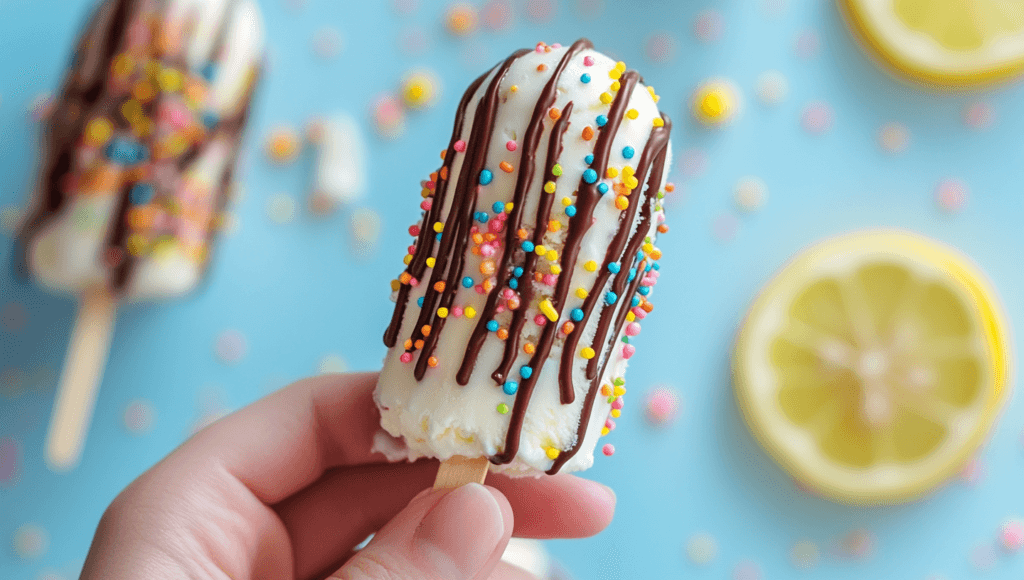
While the name may be fancy, the recipe is anything but complicated. It’s really just a layer of creamy vanilla ice cream and a coating of rich chocolate shell, both frozen in popsicle form. As the old truism goes, “The way to someone’s heart is through their stomach,” and these popsicles are sure to win the love of all who sample them.
So, are you ready to create your own frozen masterpiece? Let’s get started!
Why You’ll Love This Homemade Eskimo Pie Popsicle Recipe
- Creamy and Indulgent: First of all, the combination of smooth vanilla ice cream and a crisp chocolate coating is pure bliss. In other words, it’s like having an ice cream bar and a popsicle in one!
- Budget-Friendly: Secondly, skip the store-bought versions and save money by making these at home. For instance, you’ll need just a few simple ingredients, and the result is even better than the original.
- Customizable: Lastly, add your favorite toppings like crushed nuts, sprinkles, or even a drizzle of caramel for extra flair.
If you loved our No-Churn Vanilla Ice Cream Recipe, you’ll adore this popsicle version. Similarly, it’s just as creamy but with a fun, portable twist. Therefore, trust us—once you try these, you’ll never go back to store-bought popsicles!
How to Make Homemade Eskimo Pie Popsicle Recipe
Quick Overview
To begin with, these popsicles are incredibly easy to make, requiring just a few ingredients and minimal effort. Specifically, the key is layering creamy vanilla ice cream with a rich chocolate coating, then freezing them to perfection. As a result, you’ll have a cool, refreshing treat that’s ready in just a few hours.
Key Ingredients
Here’s what you’ll need:
- 2 cups vanilla ice cream (homemade or store-bought)
- 1 cup semi-sweet chocolate chips
- 2 tablespoons coconut oil (for a smooth chocolate coating)
- Popsicle sticks
- Optional toppings: crushed nuts, sprinkles, or shredded coconut
Step-by-Step Instructions
- Prep the Ice Cream: First, let the vanilla ice cream soften slightly for easier handling.
- Fill the Molds: Next, spoon the softened ice cream into popsicle molds, leaving a little space at the top. Then, insert the popsicle sticks and freeze for at least 2 hours, or until solid.
- Melt the Chocolate: Meanwhile, in a microwave-safe bowl, combine the chocolate chips and coconut oil. After that, microwave in 30-second intervals, stirring until smooth.
- Coat the Popsicles: Once the popsicles are frozen, remove them from the molds. Then, dip each popsicle into the melted chocolate, allowing the excess to drip off.
- Add Toppings: If desired, sprinkle with crushed nuts, sprinkles, or other toppings while the chocolate is still wet.
- Freeze Again: Finally, place the coated popsicles on a parchment-lined tray and freeze for another 30 minutes to set the chocolate.
What to Serve Homemade Eskimo Pie Popsicle With
While these popsicles are perfect on their own, you can pair them with:
- A glass of cold milk for a classic combo.
- Fresh fruit like strawberries or bananas for a refreshing contrast.
- A warm brownie or cookie for an indulgent dessert platter.
Top Tips for Perfecting Homemade Eskimo Pie Popsicle
- Use High-Quality Chocolate: For example, it makes a huge difference in flavor and texture.
- Work Quickly: Since the chocolate coating sets fast, have your toppings ready to go.
- Customize the Ice Cream: Alternatively, swap vanilla for chocolate, strawberry, or even mint chip for a fun twist.
Storing and Reheating Tips
To store, keep these popsicles in an airtight container in the freezer for up to 2 weeks. To prevent sticking, place a sheet of parchment paper between each layer. However, no reheating is needed—just grab and enjoy straight from the freezer!
Health Benefits of Homemade Eskimo Pie Popsicle
| Ingredient | Health Benefit |
|---|---|
| Vanilla Ice Cream | Provides calcium and energy, though best enjoyed in moderation. |
| Dark Chocolate | Rich in antioxidants and may improve heart health. |
| Coconut Oil | Contains healthy fats that can boost metabolism. |
In conclusion, there you have it—a Homemade Eskimo Pie Popsicle Recipe that’s as fun to make as it is to eat! Whether you’re cooling off on a hot day or treating yourself to a sweet snack, these popsicles are sure to hit the spot. So, don’t forget to share your creations with us in the comments below. Happy freezing! 🍫🍦
Eskimo Pie Popsicle Recipe From DelishDish!
Homemade Eskimo Pie Popsicle Recipe
Course: DessertCuisine: internationalDifficulty: Easy6
servings15
minutes200-250
kcalThis Homemade Eskimo Pie Popsicle Recipe is a creamy, chocolate-covered treat perfect for summer. Made with vanilla ice cream and a rich chocolate shell, it’s easy to make and fun to customize with your favorite toppings.
Ingredients
2 cups vanilla ice cream (homemade or store-bought)
1 cup semi-sweet chocolate chips
2 tablespoons coconut oil (for smooth chocolate coating)
Popsicle sticks
Optional toppings: crushed nuts, sprinkles, or shredded coconut
Directions
- Prep the Ice Cream: Let the vanilla ice cream soften slightly.
- Fill the Molds: Spoon the softened ice cream into popsicle molds. Leave a little space at the top. Insert popsicle sticks. Freeze for 2 hours or until solid.
- Melt the Chocolate: Combine chocolate chips and coconut oil in a microwave-safe bowl. Microwave in 30-second intervals, stirring until smooth.
- Coat the Popsicles: Remove frozen popsicles from molds. Dip each into melted chocolate. Let excess drip off.
- Add Toppings: Sprinkle with crushed nuts, sprinkles, or other toppings while chocolate is wet.
- Freeze Again: Place coated popsicles on a parchment-lined tray. Freeze for 30 minutes to set the chocolate.

Notes
- Use high-quality chocolate for the best flavor and texture.
Add toppings like crushed nuts, sprinkles, or shredded coconut for extra flair.
For a dairy-free version, use coconut milk ice cream and vegan chocolate.
Conclusion
Nothing brightens your day quite like a creamy, candy-coated popsicle—unless it’s this Homemade Eskimo Pie Popsicle Recipe, which is as delicious as it is easy. With few ingredients, a speedy assembly and infinite variations, this recipe is good for anyone who needs to cool off with a sweet, filling snack.
Whether you’re preparing these popsicles for a summer soiree, a family snack or simply to satisfy your sweet tooth, they’re sure to delight. (Plus, when you make them at home, you can tailor the ingredients and put your own spin on them.)
So, what are you waiting for? Gather your ingredients, make a batch and enjoy the homemade creamy, chocolaty goodness of these popsicles. And do not forget to share your creations with us in the comments below — we would love to hearr how they turned out! Happy freezing!
FAQs : Homemade Eskimo Pie Popsicle Recipe
What is a Homemade Eskimo Pie Popsicle?
A Homemade Eskimo Pie Popsicle is a creamy, chocolate-covered frozen treat made with vanilla ice cream and a rich chocolate shell. It’s a fun, portable version of the classic Eskimo Pie, perfect for summer or anytime you crave a sweet snack.
Can I use store-bought ice cream for this recipe?
Yes, you can use store-bought vanilla ice cream for convenience. However, homemade ice cream adds a special touch and allows you to control the ingredients.
How do I prevent the chocolate coating from cracking?
To prevent cracking, make sure the ice cream is fully frozen before dipping it in the melted chocolate. Also, adding coconut oil to the chocolate helps create a smooth, flexible coating.
Can I make these popsicles dairy-free?
Absolutely! Use dairy-free vanilla ice cream and vegan chocolate chips to make this recipe dairy-free. Coconut oil works perfectly for the chocolate coating.
How long do these popsicles last in the freezer?
These popsicles can be stored in an airtight container in the freezer for up to 2 weeks. Place parchment paper between layers to prevent sticking.
Can I add toppings to these popsicles?
Yes! Add toppings like crushed nuts, sprinkles, or shredded coconut while the chocolate coating is still wet. Get creative and make them your own!
Share Your Twist
We’d love to hear how you put your own spin on this Homemade Eskimo Pie Popsicle Recipe! Did you add a sprinkle of sea salt for a sweet-and-salty combo, a drizzle of caramel for extra indulgence, or maybe even a dash of espresso powder for a mocha twist? Your creativity can inspire others to try something new!
Here are a few fun ideas to get you started:
- Nutty Delight: Roll the chocolate-coated popsicles in crushed peanuts, almonds, or pistachios for a crunchy finish.
- Tropical Vibes: Add shredded coconut or a splash of pineapple juice to the ice cream mixture for a tropical flair.
- Minty Fresh: Swap the vanilla ice cream for mint chocolate chip and add a touch of peppermint extract to the chocolate coating.
- Berry Bliss: Mix in fresh strawberry or raspberry puree with the ice cream for a fruity twist.
Share your unique creations in the comments below or tag us on social media with your photos. Let’s build a community of dessert lovers who inspire and support each other! 🍫🍦
This section encourages reader engagement and adds a personal touch to your blog post. It’s a great way to connect with your audience and inspire creativity!




The history behind the Eskimo Pie is such a neat touch! I didn’t realize it was one of the first chocolate-coated ice cream bars. This recipe looks perfect for making a nostalgic treat with a homemade twist.